Tracertrak | Quick Start Guide (NGC)
General Console Navigation
Tracertrak Next Generation Console Quick Set-Up Guide
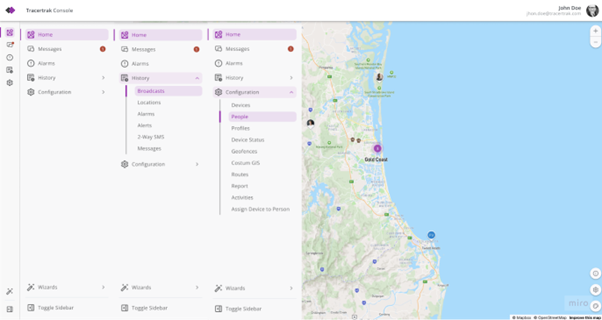
Logging in & Two Factor Authentication
Tracertrak Console Login Flow
Provide link to Tracertrak portal here
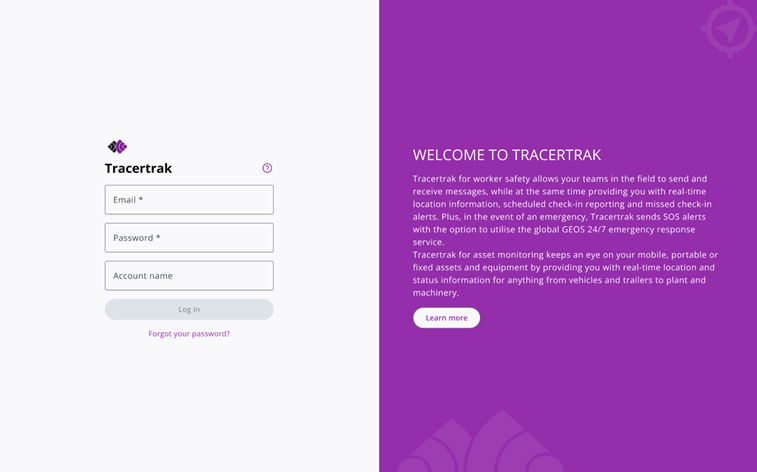
- Enter username and password and Account name.
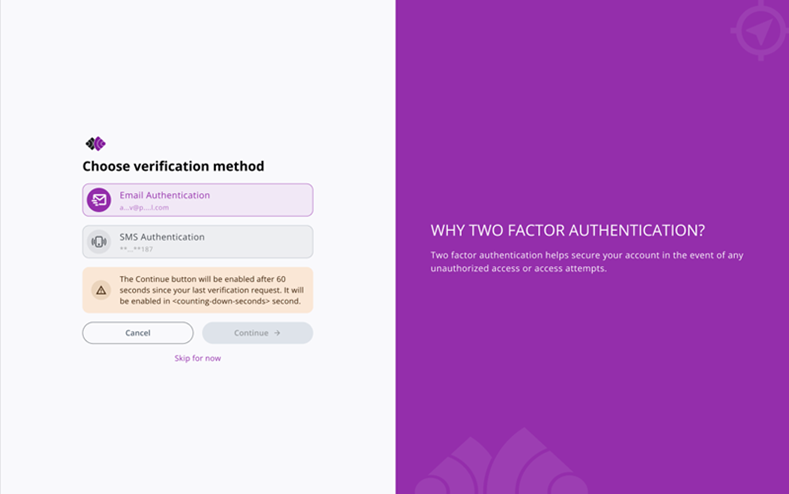
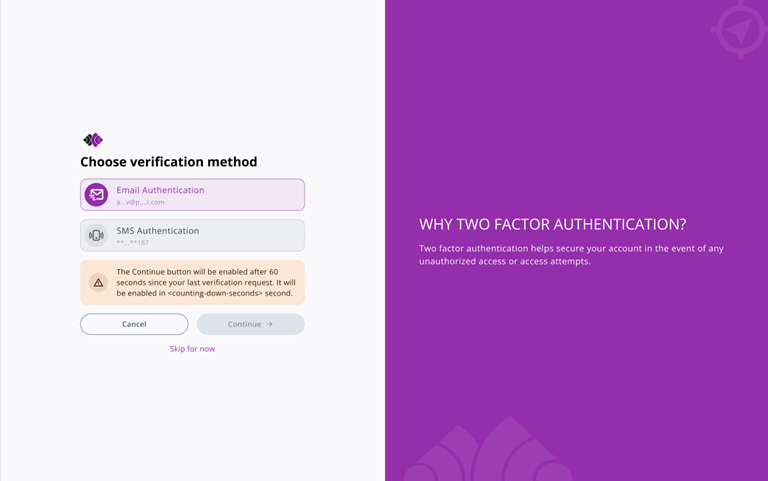
- Choose either your phone or email address that we will use to send your one-time code. Make sure to update your contact details to avoid any inconvenience.
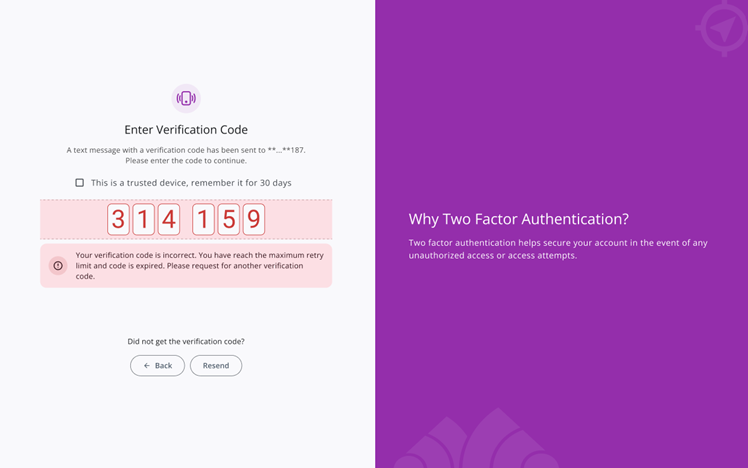
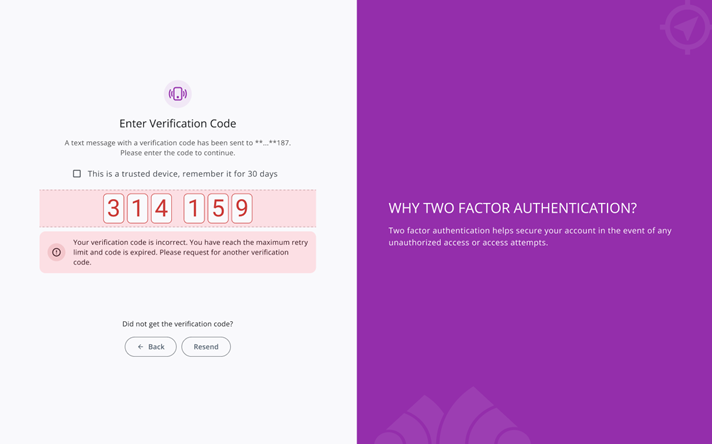
- Enter the code you have received and tick the trusted device box to remember you log in details on this device.
Information regarding Two-Factor Authentication (TFA) in the Tracertrak console.
What Is It?
Two-Factor Authentication (2FA) is a security improvement to help protect your personal information and your organisation. It does this by including an additional authentication step when logging into the console, where you are prompted to enter a code that is delivered to your phone or email.
Who does this affect?
Two-Factor authentication will be implemented for everybody who uses the Tracertrak console.
How will this change the way I work?
The only impact it will have on your work is when you log into the console. After you have entered your username and password successfully, you will be prompted with the extra security step. When the code is approved, you will be directed to your usual landing page.
I didn't receive my code.
If you haven't received your code in a reasonable amount of time, you will be able to request a new one. Check that your details are correct. If none are valid, contact your administrator to update your contact details.
What does "This is a trusted device, remember it for 30 days" mean?
By checking this box before entering the code, Tracertrak will trust future logins from your device and will only prompt you for your username and password for the next 30 days. After that, you will be asked for a new verification code.
Can I use my Microsoft or Google authenticator to log into Tracertrak?
The only method available is to request a one-time password via email or SMS.
Map & Find Location
Basic Map Interactions
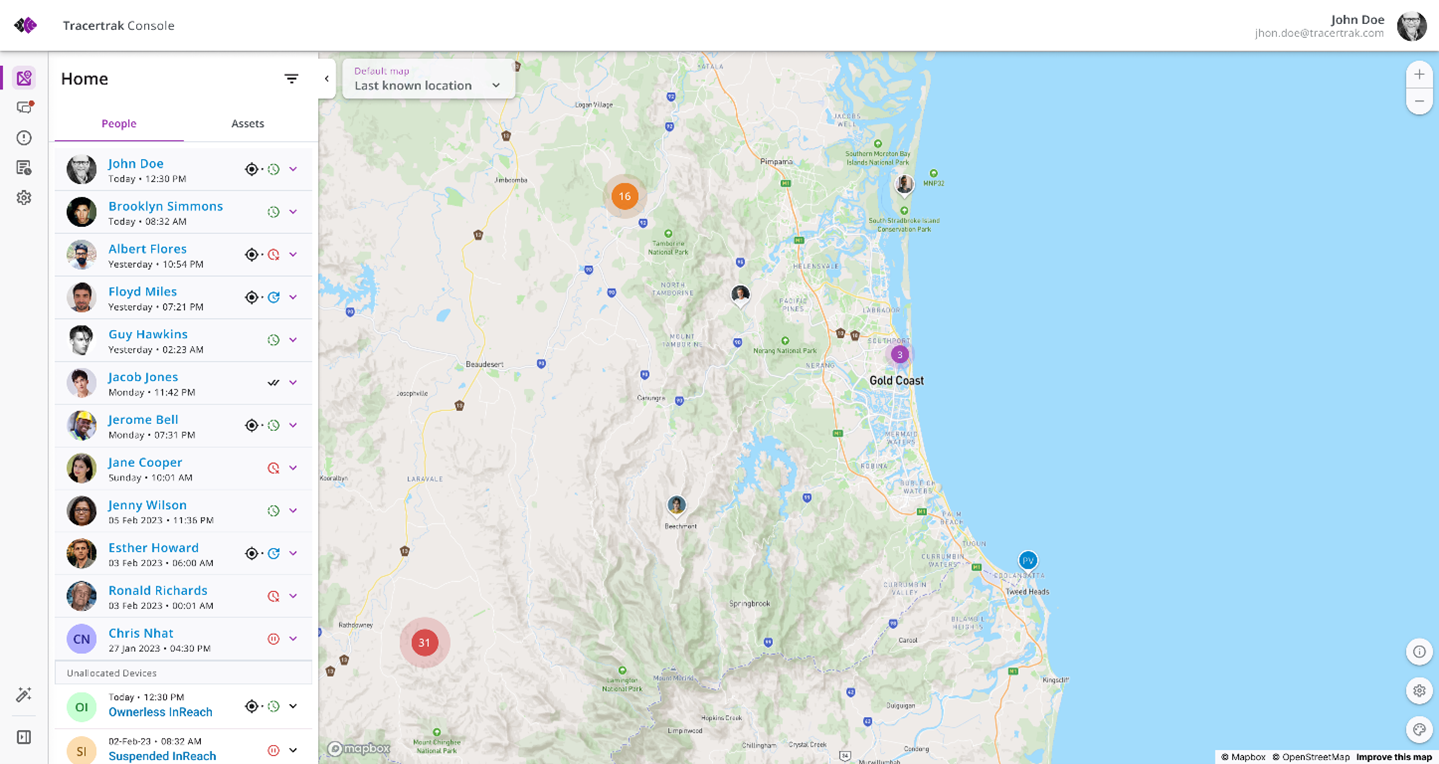
- Set preferred option for the default map in the top left corner of the map screen – No locations or Last Known Locations
- Zoom in and out using + and – buttons in top right of screen or by the scroll wheel on your mouse.
- Click on map icons to view device or person details.
- Map layers – Click the palette in the bottom right-hand corner i.e. Satellite, Street views
- Use the search bar at the top of the screen to search for people and assets.

|
Map style selector button Clicks to open / close the Map style selector to change the Mapbox map style between available options. Located in the bottom right corner of the map. |
Yes |
Search People
Select People Tab
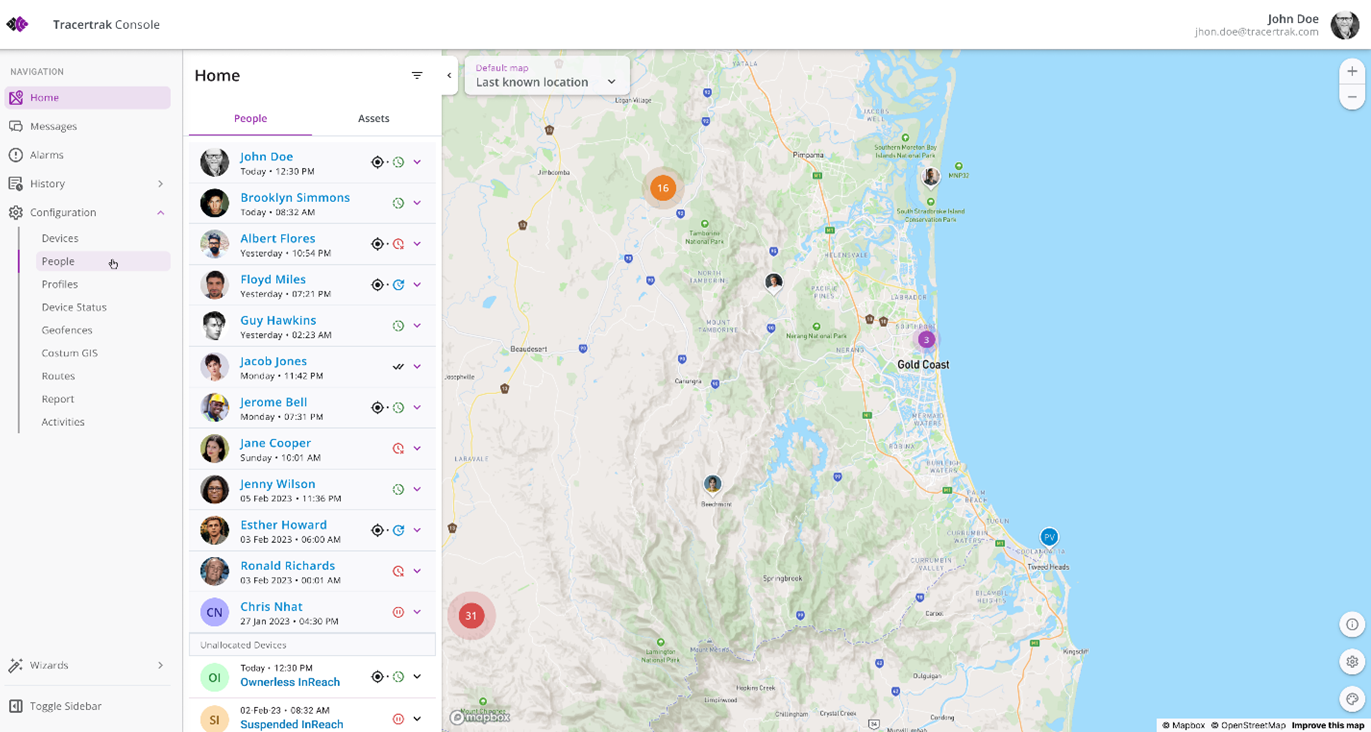
- To search for a person, use the search bar to enter the name.
|
Expand / Collapse menu sidebar button (Toggled) Clicks to expand / collapse the main navigation menu sidebar. Located in the bottom left-hand corner of the menu sidebar. |
Yes |
|
Side panel toggled button (Toggled) Clicks to show / hide the people, assets, alarms side panel. Located in the top right-hand side corner of the side panel. |
Yes |
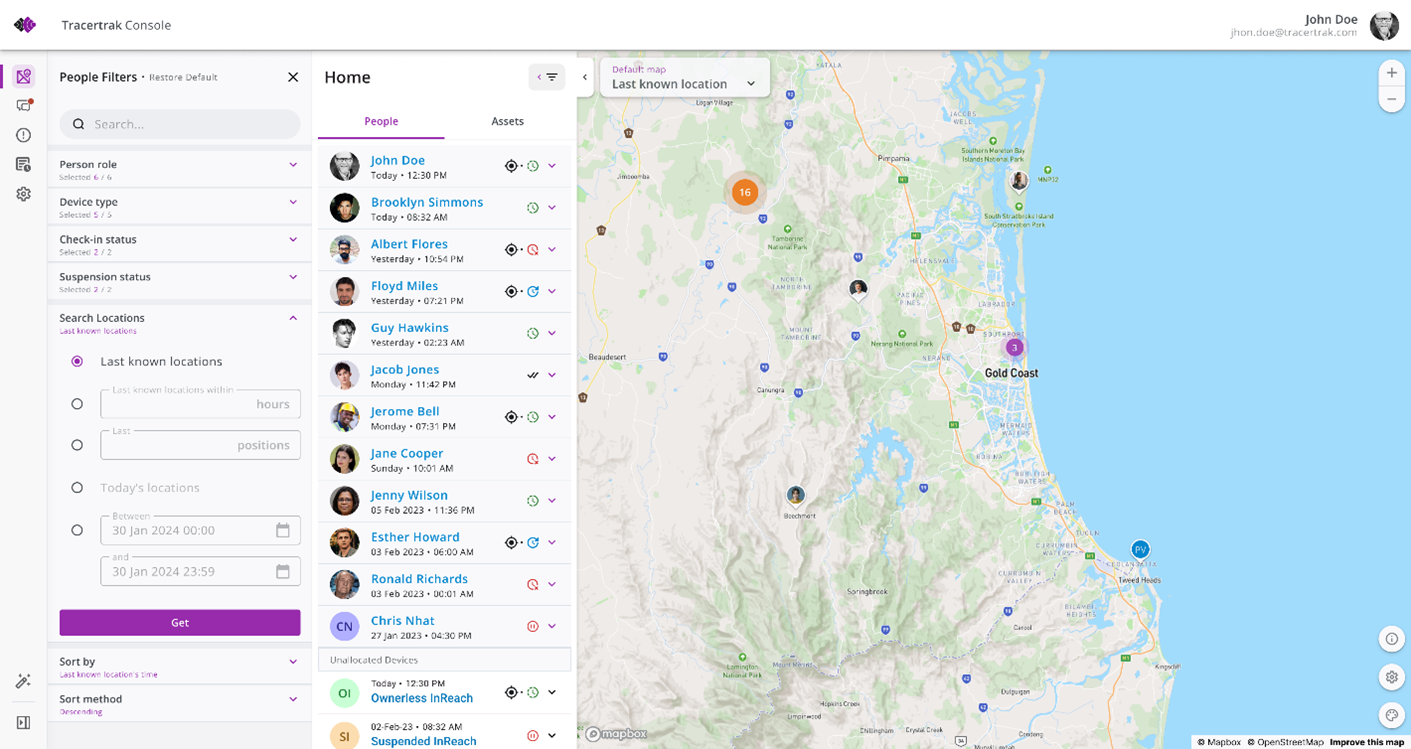
You can filter by:
- Person Role – All, Administrator, Guest, Manager, Minimum Access, Notification Only, Super User, Supervisor
- Device Type – All, Application, InReach, Iridium 9575, SPOT, SPOT3 / SPOT4
- Check-in Status – All, Active, Inactive
- Suspension Status – All, Active, Suspended
- Sort By – Person Name, Last known location.
- Sort Method – Ascending, Descending
|
Unmonitored status icon From the people or assets sidebar list item. Indicates the Schedule Monitoring is OFF |
Yes |
|
Fixed check-in status icon From the people or assets sidebar list. Indicates the person / asset uses a fixed check-in profile. |
Yes |
|
Flexible check-in status icon From the people or assets sidebar list. Indicates the person / asset uses a flexible check-in profile. |
Yes |
|
Fixed location status icon From the people or assets sidebar list. Indicates the person’s device / asset has a home location as its fixed location. |
Yes |
|
Suspended status icon From the people or assets sidebar list. Indicates the person’s device / asset is currently suspended. |
Yes |
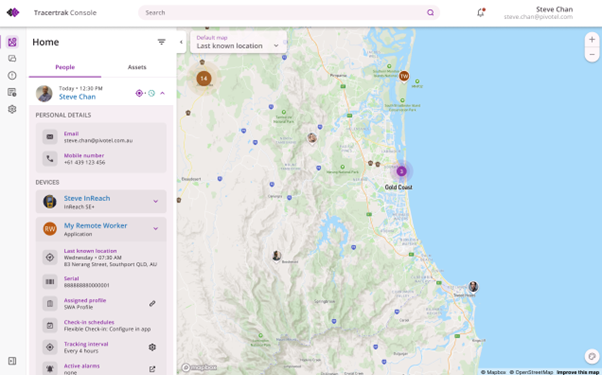
View Person & Asset Details
- Select the drop-down arrow next to the person or asset.
- See Personal details and assigned devices.
- Select drop down on devices to see device and application information.
- You may also assign devices in this section
Search Assets
Select Assets Tab
|
Filter Button Click to show / hide the filter panel. Located on right hand side of People / Assets header panel. |
Yes |
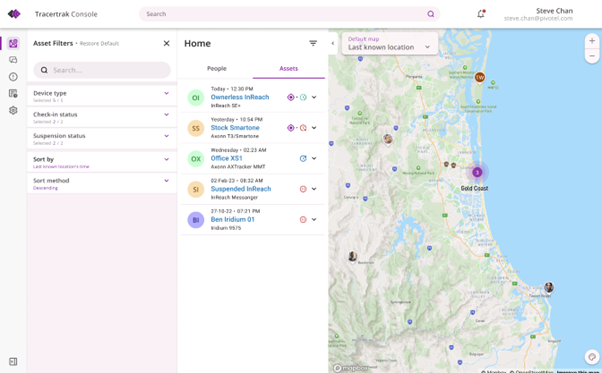
- Device Type – All, Application, InReach, SPOT etc.
- Check-in Status – All, Active, Inactive
- Suspension Status – All, Active, Suspended
- Sort by – Asset name, Last known location.
- Sort method – Ascending / Descending
Home side panel sections
|
Expand / Collapse menu sidebar button (Toggled) Clicks to expand / collapse the main navigation menu sidebar. Located in the bottom left-hand corner of the menu sidebar. |
Yes |
Messages
|
Create new conversation button Clicks to start a new conversation or a new message to selected contacts. Located in the right-hand side of the Messages header panel. |
Yes |
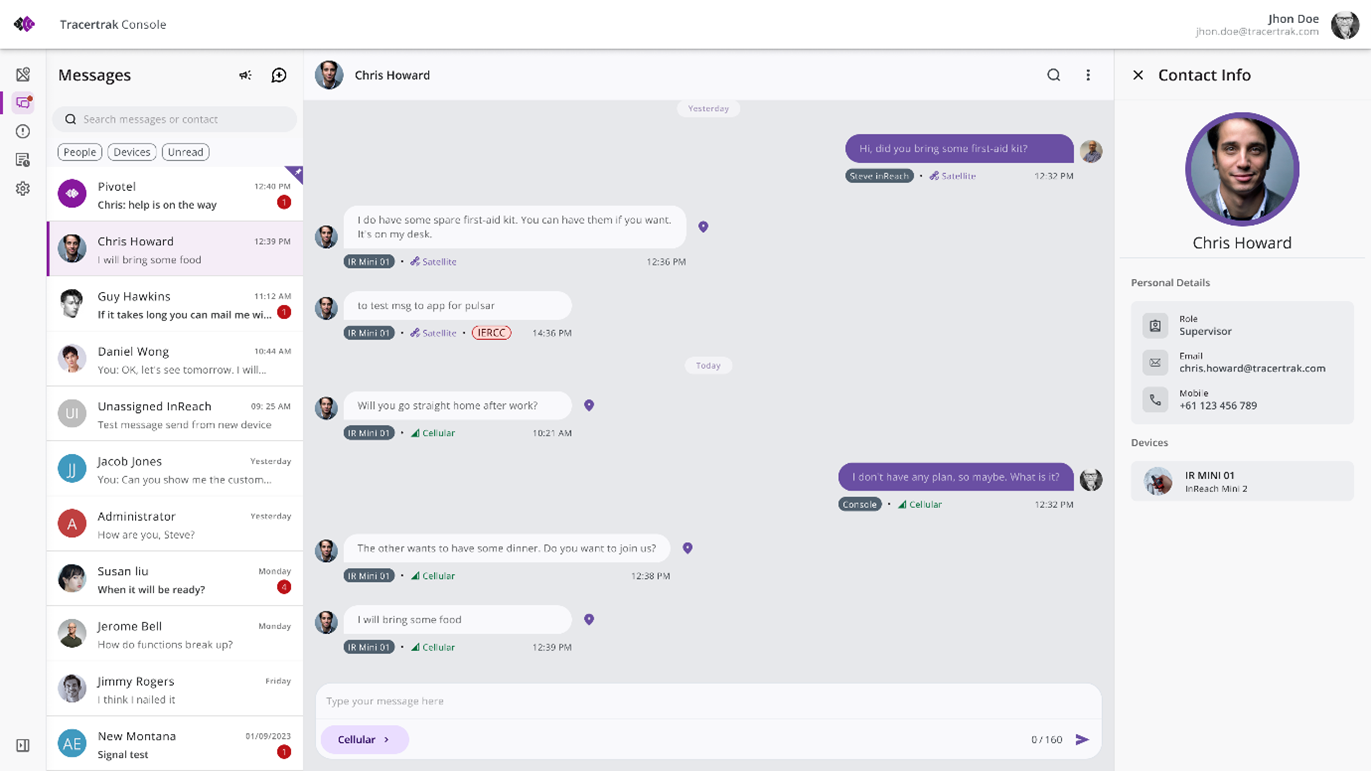
Single Conversation example:
- The Messages side panel shows all messages from People/ Devices and those Unread
- To begin a message, select the contact by pressing the + button inside the Messages panel.
- This will bring up a list of People to select from and begin your message.
- By selecting the 3xdots in the top right bar of the recipients message the individuals contact details will be displayed in an expandable panel
- You may select the method of transmission for your message i.e., Console to Console or Satellite based on your permissions of your role set by the Administrator
Account Conversation example:
All users in the account can see these messages. The Account message group is pinned to the top of the conversation list. Note: Sending satellite messages on this channel could result in additional messaging costs.
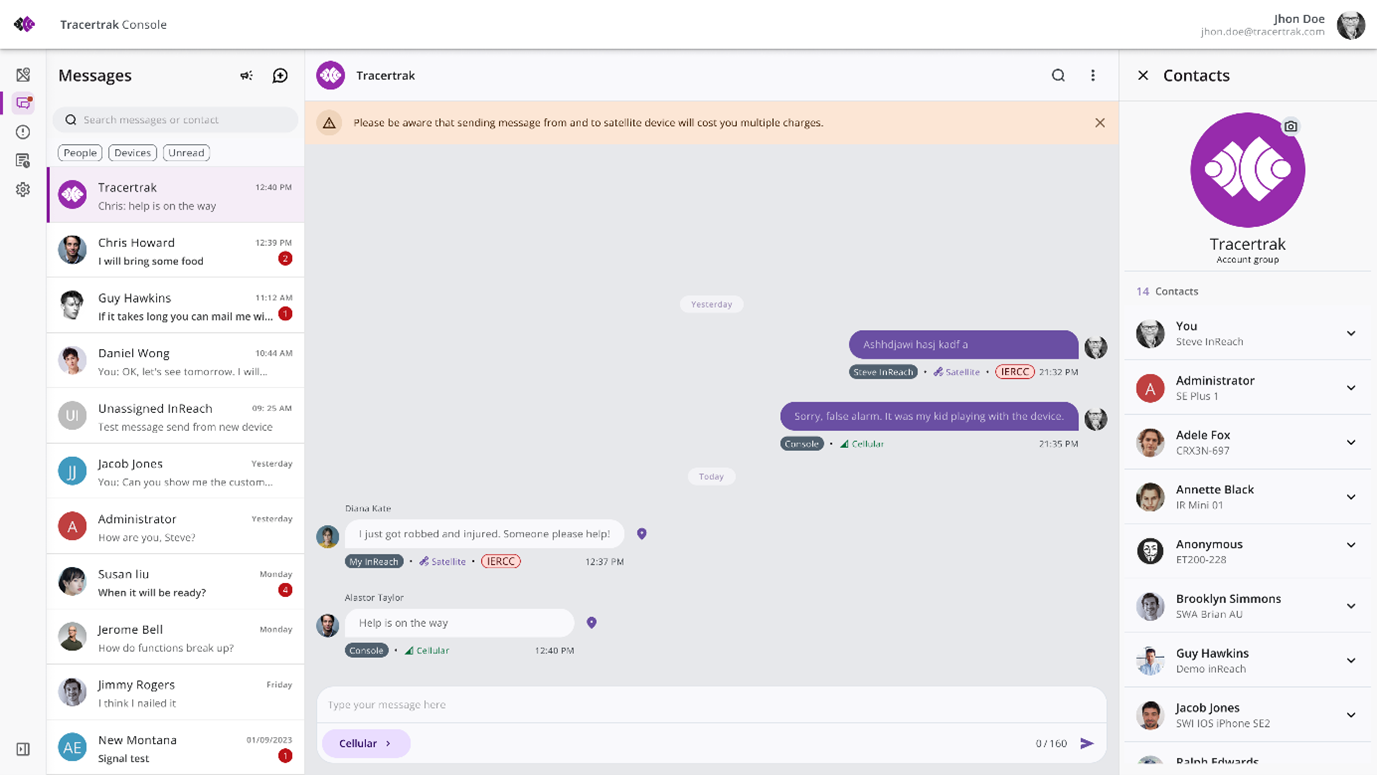
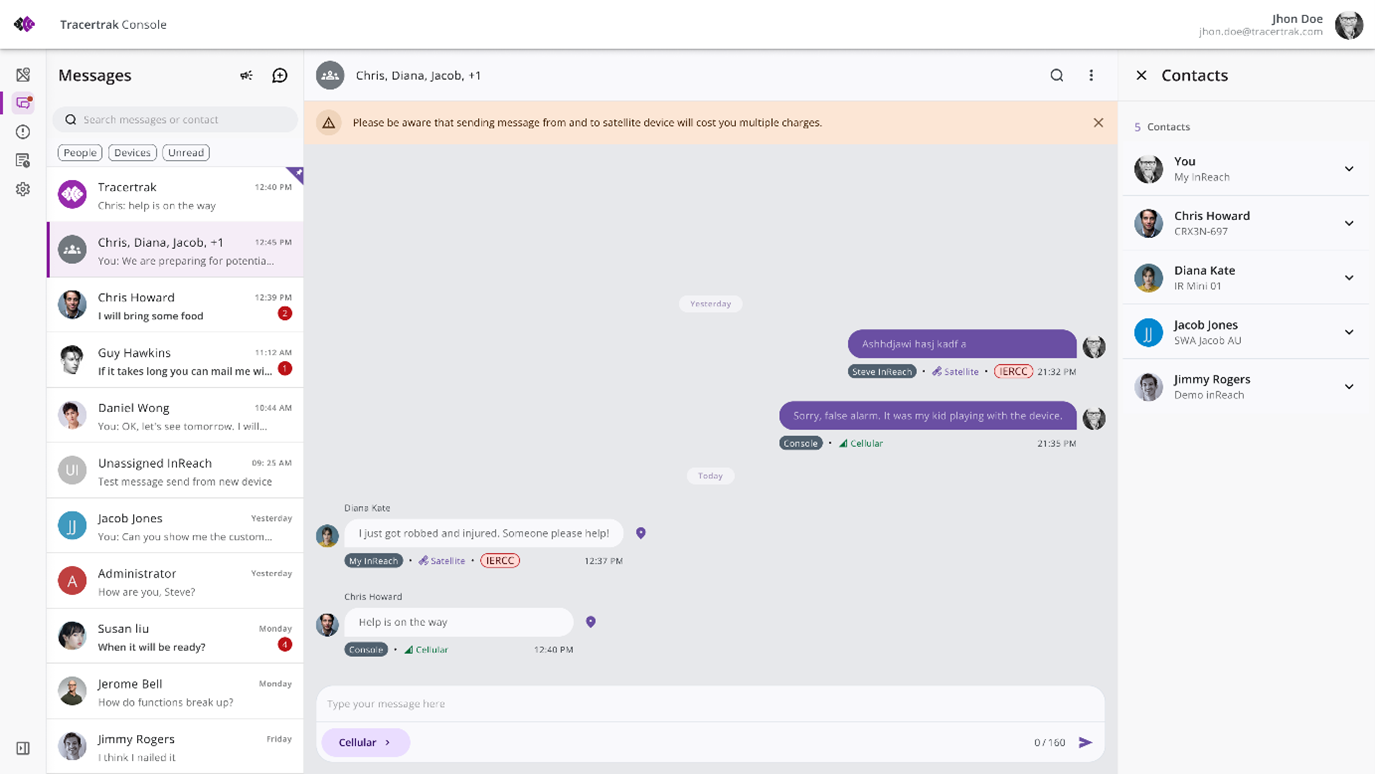
Group Conversation example:
Users can create a group chat by selecting multiple users and adding them to a group. The Group chat name can be changed.
Alarms
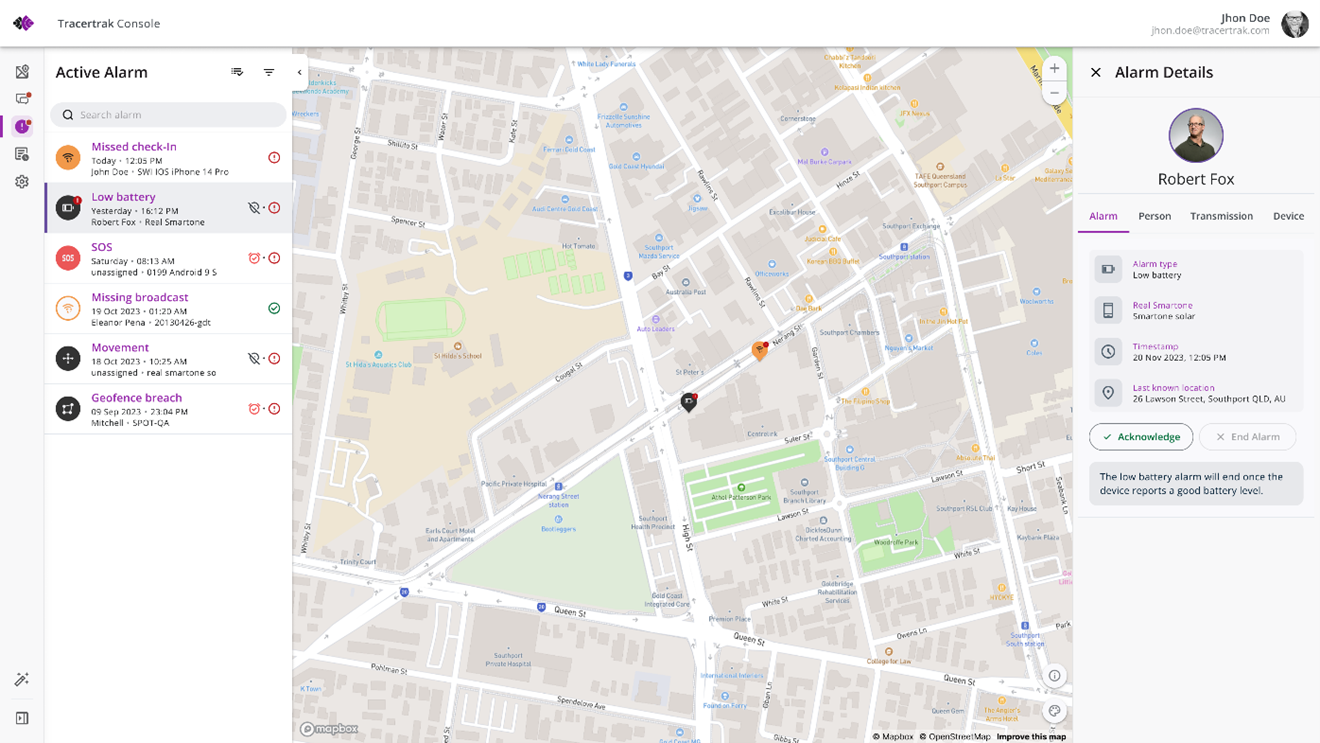
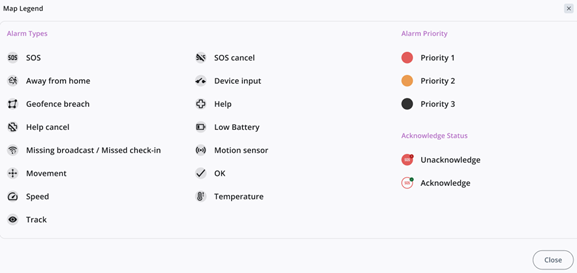
- Shows missed check-ins, low battery, SOS, movement, Geofence etc on the map and in the side panel.
- Alarm details are shown on right hand side expandable panel by clicking on each alarm.
- Acknowledge and End alarm function are performed from this panel
- Alarm Details Panel – Outline, the Alarm, Person, Broadcast and Device information.
- Search and Filter functions are available for Alarms.
History
- Broadcasts
- Locations
- Alarms
- Alerts
- 2-Way SMS
- Messages
- Audit Log